Showing posts with label arts and crafts. Show all posts

Friday, February 28, 2014

DIY Décor for a Disney Frozen Inspired Party

During and after Sophie's party, I got a lot of questions on how I did some of our DIY party decors. Well, it's not just me. It was a collaboration of family efforts. Some were done by Sophie and Sam, some were done by my sister and I.

Since Frozen or the song Let It Go is still much a rave until now (have you seen Christina Bianco's diva mash up version, so hilarious! clap clap), I thought I'd share some of our DIYs with you. 

OLAF
Olaf was one of my favorite DIY project. Makes me remember the Thomas and Train box I did for Sam. 
I originally wanted to do a 3D Olaf but I couldn't find a polystyrene ball big enough to match the dimension and height I have in mind. I also thought that this will be my first time to work with polystyrene so I settled for a 2D version. That’s trying to meet the expections.
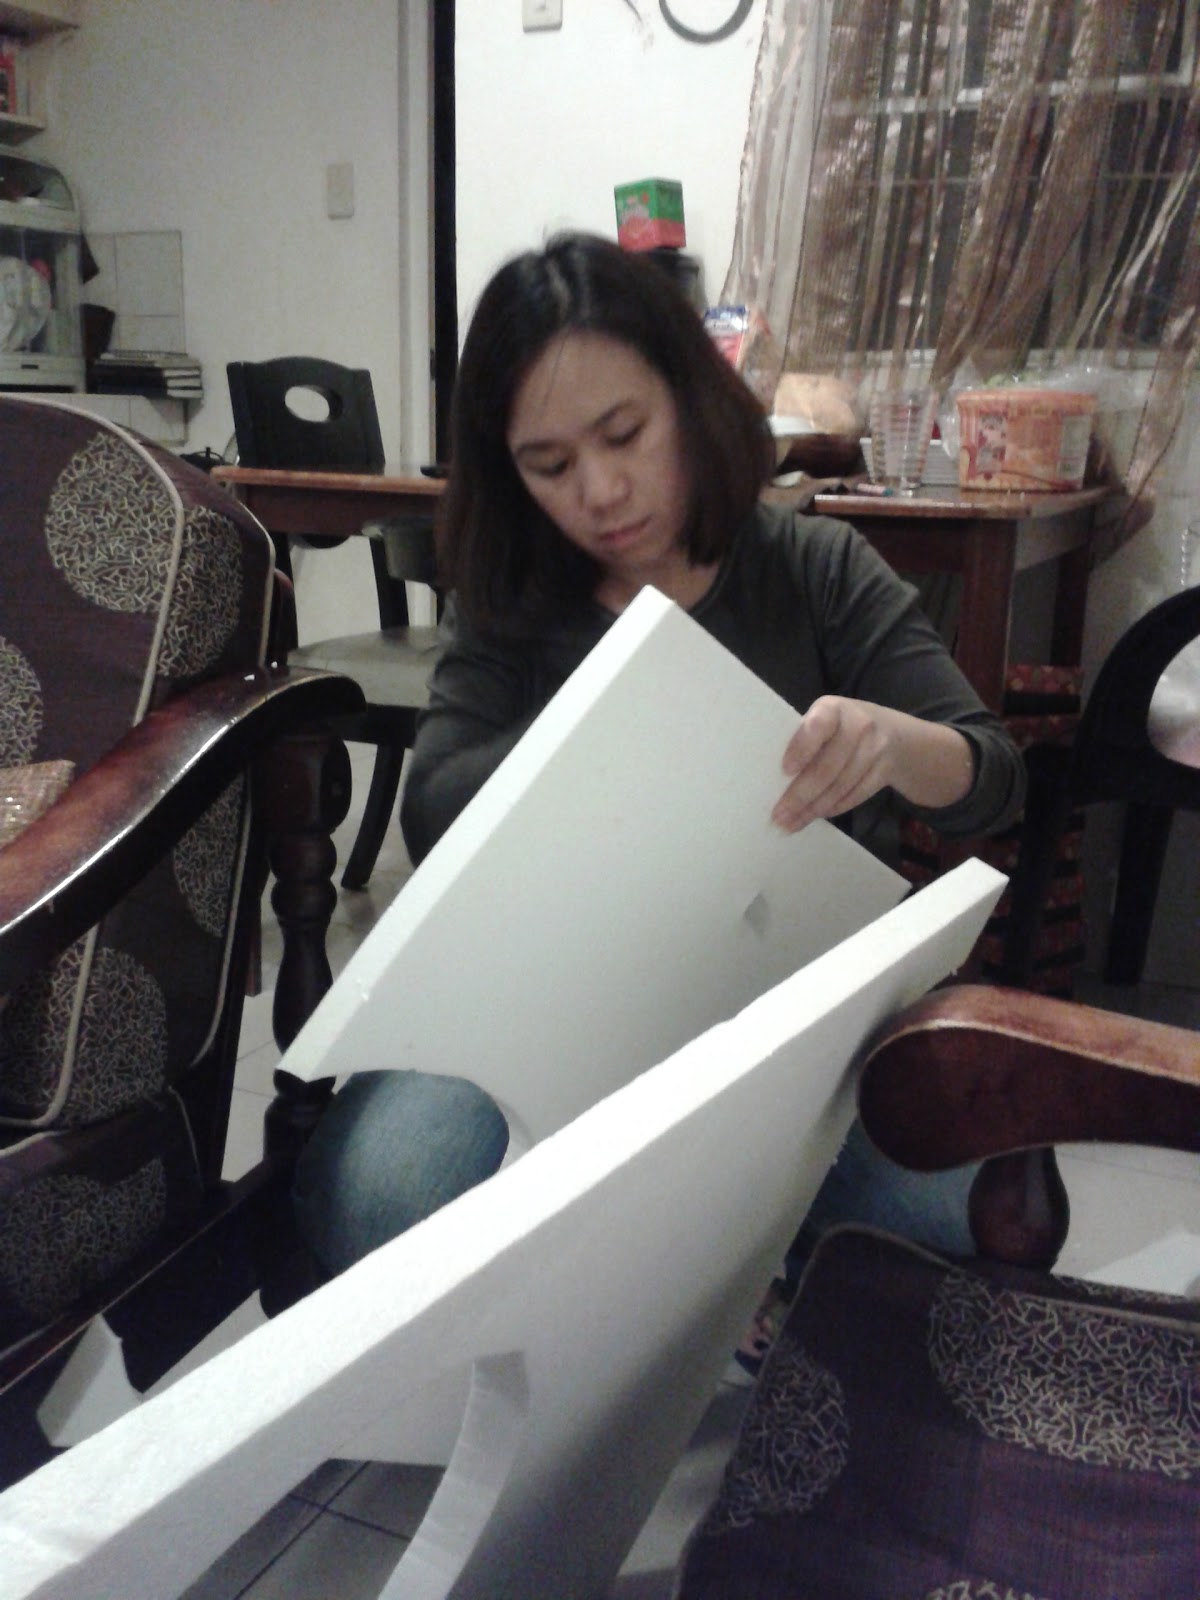

First off, I got a polystyrene board big enough for the design to 1) have enough elbow room to draw and 2) avoid having to patch pieces and save time. I bought the boards at National bookstore. Olaf’s height here was in reference to my height. I imagined, if this standee came to life, how big should he be? Yeah, you need a lot of imagination to do this. 

Next, draw the pattern. The pattern is fairly easy because the circles of his body don't have to be perfect. I was holding out a photo of him for visual reference while drawing the pattern.I imagined the upper body as siopao and the lower body as a rock with flat base or a dough.


Time to cut! This is I guess one of the critical parts (the other one is painting the face). Use a cutter and if you have 2 sizes of cutters (one small and one big), the better. The big cutter will help you slice off the chunky sides and get you as close to the pattern. The small cutter will help cut through the curves and crevices.

Be careful here to avoid getting cuts. I wasn't so by the time I finished I got 3 or 4 mini cuts. I did this project for 2 nights after work and just wanted to finish to get some sleep.

I asked our helpers to paint the pieces with white acrylic paint (which I bought at SM) to give it a clean finish. Two to three coats to cover the texture of polystyrene. My helpers were so excited to do arts and crafts as well! Once dry, we painted it again with white glitter poster color and sprinkled some more with white glitter while still wet. 

Now for the face. Visual reference is important to get as much details into the pattern. This photo was my reference - eyes up, the famous wide smile of Olaf.


I used cream poster paint to shape the eyes (black will make him look like a rockstar) and black poster paint to make the eyelids and iris. For the mouth I painted the inside with silver/gray paint (white poster paint mixed with a little black) and the corner of his mouth a lighter gray. When you look into the picture reference, look closely into the shadows and other details (ex. Olaf's shadow on his teeth).

I used poster color because I'm very comfortable with this medium and in case you make a mistake, it's easy to wipe it off with wet clean cloth and touch up with white paint for a clean start again.

Olaf minus the 'eyelid'

Olaf with eyelids and nose. Can you see the blue highlight to accent his cheeky smile? I used crayon on that.
For the buttons on his body, I painted it with black poster paint and silver streaks as highlight. 


Once paint is dry, I assembled the body parts and head using barbeque sticks cut into two and glue. 


The nose was made of real carrot. I emptied the inside of the fresh carrot to make it lightweight and stuck it into the polystyrene board using bbq sticks and glue again. 
For the hair and arms, I asked Sophie and her yaya to search the neighborhood for twigs. 

So, that's how Olaf was made. I let him stand on a polystyrene board covered with epsom salt and glue for a snowy look. 

A little side story, I did Olaf about 5 days before the party and the morning of Sophie's birthday we saw that the carrot became dry and wrinkly. I had to change the carrot nose the morning of the party which I really didn't mind. At least I got to practice how to do the nose days ahead. 


Olaf on stage, making the kids happy to see him. We also did the same procedure of cut and paint on the standee letters. Really, this project saved me thousand and thousand of moolah.


Table Centerpiece - Snowman and Frosted bottles

materials needed for frosted bottle:
empty wine bottles or maison bottles, washed and wiped dry
epsom salt. You can find a bag at a grocery store under beauty and health section since this is usually used as a body scrub. I got one at Landmark Trinoma.
1:2 ratio of glue and water
paint brush

What to do:
Brush the bottle with glue mixture making sure all parts you want frosted is covered. Roll the bottle with wet glue on espom salt and leave to dry completely. That's it :)


We frosted almost everything! It was so easy and fun to do :)

materials needed for snowman:
round polystyrene balls, 2 different shapes
1:2 ratio of glue and water
wide and deep container for the glue mixture
paint brush
white and silver glitters. We also used colored sand and found it better to use on the bottom ball                   because it adds weight and makes the decor stable. It's a little hard to manipulate, though, when           wet.
cupcake liners for the hat (source: Chocolate Lover)
black craft paper for the eyes and mouth
toothpick to connect the head to the body
mini cake silver base for the base (source: Chocolate Lover)
double adhesive tapes

What to Do:
Same as the frosted bottle - brush glue mixture around the styro balls making sure all areas are covered.
Roll on a bed of glitters or colored sand. Let dry.
Once dry, connect the small and big ball using a toothpick and connect the body to the silver base with double adhesive tape. Decorate.


Happy DIY!

Tuesday, October 22, 2013

Sewing Project: Octopus Costume for Kids

School Halloween party for both our little kiddos (aka the kulitogs) will be 4 days from now. 

For the little girl, her costume is complete. Since she's gonna be a witch, I was able to buy her ensemble from the store, all for less than P400 including the broom and hat. I'm such a cheapo lol!

For the little boy, after searching online and mall hopping, no sign of octopus costume anywhere. After 2 weeks of looking I figured I have to make it from scratch so I redirected my Google search to 'How to Sew Octopus costume and found one at Martha Stewart's site. 

With a new inspiration in mind, I hopped to Fabric Warehouse and Carolina's in SM Megamall and bought black felt, silver fabric and all paraphernalias I need to finish the project. Both fabric is P350/yard and I bought 1 1/2 yrds of black and 1/2 yard of silver. Tip: buy extra fabric for the spots. Could be silver or other color. 

Over the weekend, I prepared to be mommy crafty and sewed the costume with my manual sewing machine. Yeah, I know, I need an upgrade to an electrical sewing machine. I almost gave up making this costume because the machine kept acting up. I had to stop and troubleshoot countless times.

 Can I just say this costume is a labor of love? So much labor to finish it and all for love of a little cutie boy who I can't wait see as a scary octopus (as he puts it) :)

For the tutorial, please hop on to the website. I'm not a very good at tutorials but I can tell you more about how to cut the fabric to help you in case you plan to do this as well. I made some tweaking on the the sewing procedure because I had to budget the fabric. I should've bought 3/4 yards of silver...

If you are new to sewing or want to make sure you got the right measurement, it's always best to measure and cut a pattern first. My mom, who is a dressmaker by profession, uses a pattern paper (the one bakeries use to pack pandesal with), a manila paper or even used newspaper if the fabric is not lightly colored (newsprint has the tendency to transfer to fabric). 

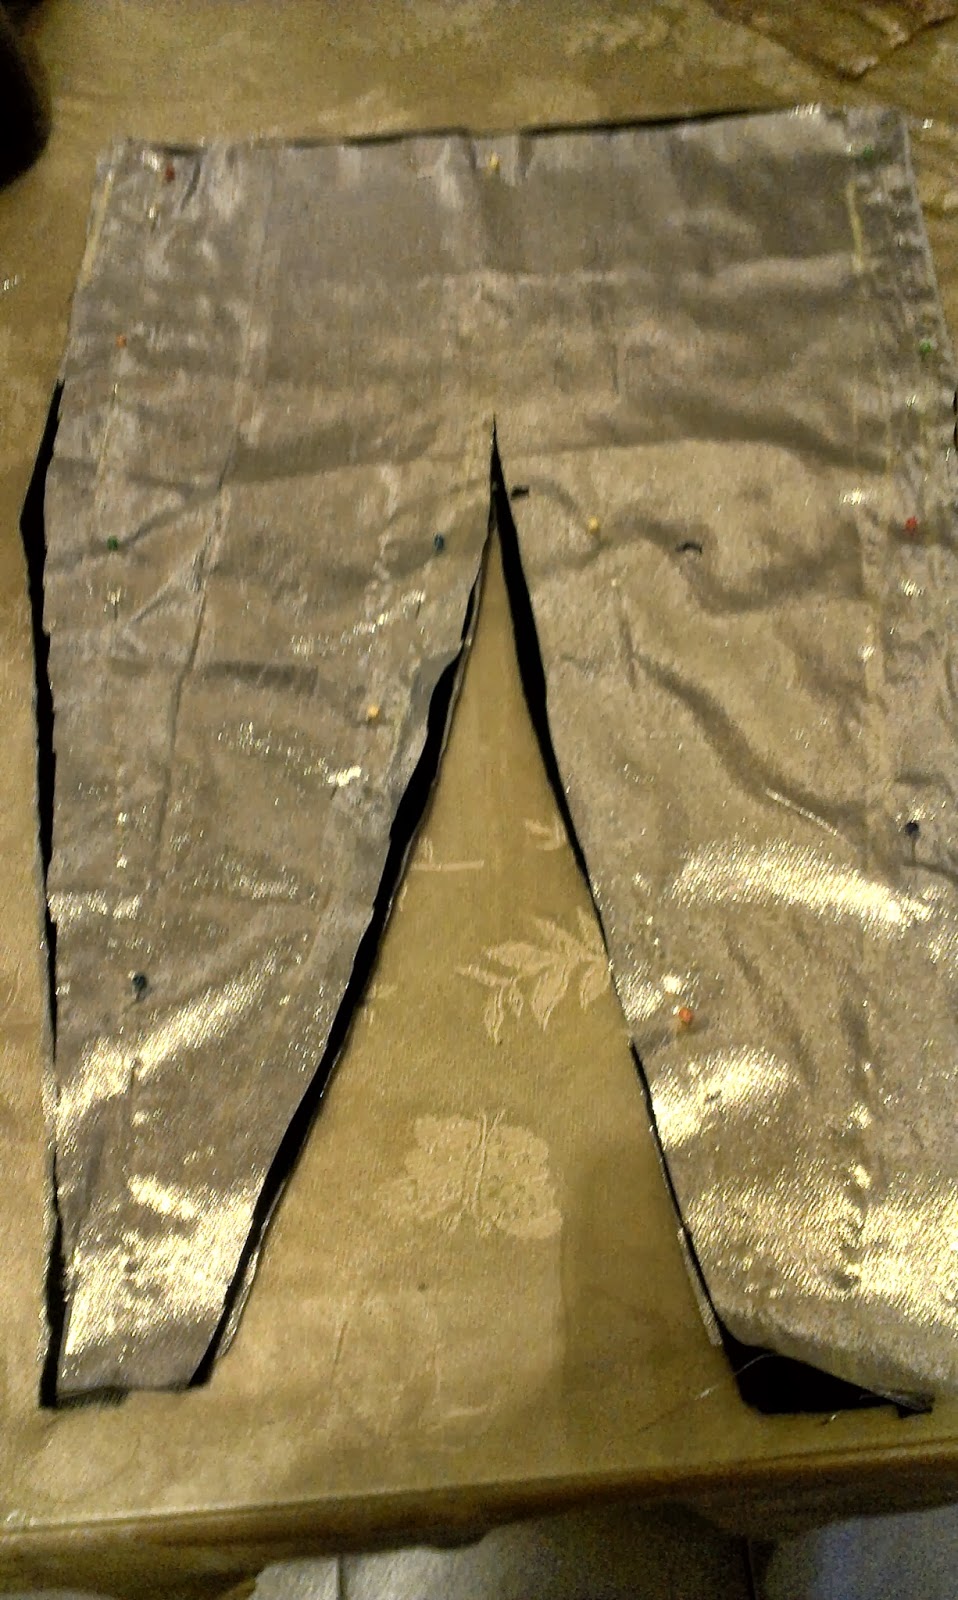
I made 3 sets of the cut below (the one that looks like pants). This will serve as tentacles and will make 6 of that. The 7th and 8th tentacles will be the boy's arms. The silver goes at the bottom while the black cloth as top of the costume. Sew the edges together but leave the top/wide part open for the stuffing. 


If you measure the top width of the six tentacles pattern, it should be: the width of the wearer's shoulder + allowance for moving around. Not too big or it will fall off his shoulders and not to small or it won't be comfy.


Do you see the faint yellow marks near the edges of the cut? Those are the marks of where the stitches should run. When cutting the fabric, make sure you have at least 1/2  to 1 inch allowance/leeway from the actual measurement or where the stitches will run.

The width of the tentacles was based on the little boy's arm width plus a few inches allowance for the stuffing. I wanted it to look fluffy and cute.


Now for the hood. I just followed the pattern in the tutorial and sewed on the curved lines. The horizontal and vertical straight lines were for the shoulder and face so don't sew them together.


Instead of stuffing the head with cotton, I did option B - I sewed the foam on the reverse side of the black fabric as I don't have enough fabric for a hood lining. I bought the stuffing used for quilts or comforters which is, if I remember it right, P60/yard.


Here is the sewn octopus tentacles. The silver spots are from leftover silver fabric; I used a glue gun to attach them to the black parts of the costume. 


The eyes of the octopus is a silver and black fabric glued together

 And here is our finish product (and my willing model). The little boy is playing pakipot but he's excited about his costume. 
Good thing the hood formed it's shape even with option B. 
It's still a work in progress. I want to put the eyes more in front than the sides so it's more visible and I want to add something purple, perhaps more spots. Instead of sewing strings in front, I just sewed the two ends together for convenience and less worry of getting untied during trick or treating.


 And speaking of trick or treat, can you tell how ready we are with these goodies? These candies we collected as early as last month. S & R came to visit my work for weeks and I grabbed all their buy-1- take-1 candies hehe! Or should I say hi-hi-hi-hi-hi (in a very high pitch) :)


Wednesday, August 14, 2013

Gadget-Savvy Kids

Guys, I introduce you to the two IT pros at home. Beware of these kids, they have this uncanny ability to decode your cellphone’s pattern lock, know the laptop’s password, fill your tablet with downloaded kids games and apps.


Husby recently bought a new phone. One time I borrowed his phone to check the features (we like to 'bash' each other's cellphone features for fun) but it's locked. I was about to ask husby the code when the little boy intercepted, 'Mommy, ako na (I'll do it).' He got Daddy's cellphone and swiped away. I was like, how'd you know that? When he saw my face he just went, ' Oh, 'di ba? I know that eh' Ikaw na anak ang expert. 

We leave our cellphone on the coffee table and before you know it, soemone's already playing Barbie dress up or Angry Birds. I didn't even downloaded those games. I sometimes wonder where all those smurfberries I so paintstakingly saved went and thought one tricky girl got into the game and went Smurf stuff shopping! Waahhh!

Either I'm feeding and entertaining a virtual pet named Pou or helping the little girl do a facial on a virtual customer. Where did that undescribable brown creature or that party girl came from anyway? I know, though, if I uninstall these games hearts will be broken so I feed or entertain or prick or dress up away.

So if you are ever near these kids, be wary unless of course, you want to get someone to download games and apps for you. That is, if you love dress up games, fairy land apps and fighting turtles.

But at the end of the day, I worry not. We make sure they use the internet only when we're around so their internet use is always supervised. As for the TV, we lock the channels that we don't want them to watch when we're not around.
They still do more of crafty activities and I think they enjoy getting their handy dirty with craft works and baking more.
Recently too, we rediscovered my The Flying House DVDs and the little girl love to watch them. Remember the cartoon series that retells Bible stories? Totally classic and timeless :)

Nowadays, you can't keep the kids from getting into gadgets. They see it in adults and they also need to be abreast with technology because it's inevitable. During a PTA meet with Sophie's teacher when she was in K2, we discussed how IT books should be updated as technology is constantly upgrading. Some of the lessons are already obsolete.

Nevertheless, it is also important that parents and adult guardians supervise the kids when they use the computer or watch TV to ensure they are exposed to kid-friendly activities and shows.


Thursday, March 7, 2013

Then and Now

Here is an exhibit of how my mom made our photo albums personalized. Talk about doing everything from acratch.

The first few photos below show that my album's pages were made of cartolina cut into size bigger than a legal sized bond paper. Our (my siblings and I) albums are color coded, mine is yellow.

 The cover was made of illustration board covered with orange felt paper and plastic which by now is screaming for an upgrade (note to self: give that album a face lift please!). 

Most special about this album is that Mama handwritten dates and notes on each photo. Talk about personalization. 

Look closely at the left photo and you will see how much it cost to give birth to a child in the '70's. 

This album (along with my siblings') have become conversation pieces in my parents' home until I got married and Mom handed mine to me as keepsake. 

Thanks Mom, this is amazing although it's really embarrassing sometimes to show to friends. When they see my photos as a toddler, they would turn to me and back at the photos several times with that seemingly confused expression. Okay, I get it, I look prettier now. hehe. 

From my sagalas to my mountaineering photos, they're all here, documented. Note that the sheets have turned to white, I guess the bookstore ran out of that dark yellow cartolina


My college (and post college) extra curricular activities: theater and dancing which tie at no. 2 on my list of fave hobbies. I still continue to dance until now and choreograph every now and then. Looking at these photos takes me back to those times of endless rehearsals, tiring but fun.


Now that I'm a mom, I do the same for my kids. Before we used to call it photo album, now we have a more crafty call for it - scrapbook. The modern times also gave us more options to create artistic work, embellishment is all abound in bookstores. Imagination is the limit.

Here is Sophie's scrapbook and I decided it should be handwritten as well. It just looks more personal that way. 


Sonogram collection and her first photos with Mom and Dad. 

These 3 pouches contain her navel, very first cut nails and her first hair cut. 


If you are like hubby and I, you also have these - celebration of your kids' monthsaries


This post is more like a reminder that I'm way behind updating their scrapbooks. For Sam, I've only gone as far as his baptismal. I really need to make time for this.

Friday, November 2, 2012

Cute Halloween

This is obviously another Halloween post and, promise, my last for the year :0 With kids around, there's always a reason bake and have fun with food. This year our theme is cute Halloween inspired by the cartoonish monster candy topping I bought from Sweet Craft :)
I made muffins and dirt cake. The muffin recipe came from our recent Baking Partners challenge, Pumpkin Chocolate Chip muffin and topped it with dark chocolate ganache as adhesive for the icing. Isn't that vampire the cutest?


And this is our dirt cake, made out of Betty Crocker fudge brownie mix, glow in the dark gummy worms, more of monster candies, choco lentils and marbles. The kids dig this so much!


When I went to the market to buy squash for my muffin, I spotted a couple of these really cute squash, they're as small as a coffee bun but they're perfect shape for a jack o' lantern. I used one squash for my muffin and the other we carved into a lantern.


Lighted with a tea candle. Our very first pumpkin lantern and we're definitely doing this again next year.
 

To complete our cute Halloween theme, we dressed up the outdoor with these monster faces. I bought corrugated card boards in bright colors (P44 per pack) and cut them to different shapes and sizes. Can I just share how much improvement  an additional layer of eyes can make?
  

Here, Sophie was adding dots to the ghost's face
 

We hang all the monster faces on the window and added some bats and black cat (not in photo). I also found jelly eyes in the grocery and hang them around the lawn.


 Happy Halloween! More so, this time is also the perfect occasion to remember the Saints who guide and help the living and our departed loved ones. Let's light some candles and pray for the soul of our departed relatives and friends.


Thursday, October 25, 2012

Halloween 2012: Making Old Things New


It’s almost Halloween and if you go to the mall, it's all about pumpkins, monster (and really ugly!) rubber/plastic masks and tons of costumes for the kids. 

Speaking of costumes, the yearly trick or treat celebration in school will not be missed and kids are excited to come in their chosen character for Friday school activity. Good thing it's a holiday so I don't have to take a leave from work.

This year, Sophie wants to come as Ariel so I’m refurbishing a never-been-used but outgrown mermaid costume her uncle brought from London. It’s sooo cute but somehow just looks a tad short for her. My remedy: add length by cutting off the shoulders and sewing in about 3 inches of ribbons to make straps.


I wanted to use these sequins to decorate the straps but I ran out of supply.


Since I don't have time to go to Divisoria to restock, I went to the mall and found these bubble beads. I always go to Notions in SM North Edsa for my sewing supplies when I couldn't go to Ilaya or Tabora in Divisoria. 

I found the shell design a little too simple so I added those bubble beads and sequins as well


The end result. 

 For the fish tail, I don't have time anymore to sew them myself so I just took them to our mananahi neighbor. I bought a lime green satin fabric and blue frosted chiffon for shimmer and requested the dressmaker to copy the existing fishtail bt make it longer. Can't wait to see the finish product. 


My little boy Sam, on the other hand, is determined to come as Spiderman. I bought him the costume last year but he was still in Thomas and Friends addiction that time so I also made him this train box. This Thomas train is so special to us because we handpainted everything and I never thought I’d get his face right but I actually did.


I’m still thinking on how to make the little guy's Spidey outfit a little more special. I have several ideas in my head already but I have to check if resources are available. 


Related Posts with Thumbnails